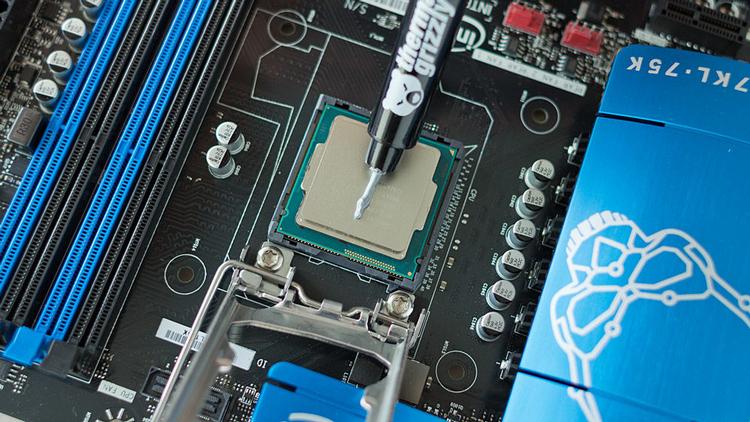
In this guide, we will be using the Intel Core Haswell i7 4770K and the Intel Desktop Board DZ87KLT-75K for demonstration purposes. You can use the ‘vertical line’ method for other generations of Intel CPUs, though. We will also explain the best thermal application for AMD CPUs, as the ‘pea-dot’ method yields different results. We would like to thank Overclockers UK for sending us the Thermal Grizzly Hydronaut Paste, which costs £10.99 and the Akasa AK-TC TIM Clean CPU & Heatsink Cleaner, which you can buy for £5.99.
Disclaimer: All the pictures in this guide are pictured with the CPU latch open for clarity. You should ensure the CPU latch is closed and secured before proceeding. This isn’t essential, but prevents thermal paste from being accidentally applied to the latch.
How to apply thermal paste to a CPU: understanding the importance of thermal paste
If there is too little or uneven thermal paste application, you might see a few of your CPU cores running hotter than the rest. Similarly if there’s too much thermal paste, you might suffer from bubbles between the CPU and the heatsink, creating pockets of heat to build up. Previously, it was believed that a ‘spread’ method yielded the lowest CPU temperatures. However, due to heatsinks and even the CPU’s Integrated Heat Spreaders (IHS – the metal part on top of the CPU) not being perfectly flat, micro gaps between the heatsink and the CPU create less efficient heat dissipation through the spread method. As well as the methods here, you can also use the X-shape, double- and even triple-line methods, but we’ve found the line and pea methods to be the best for the vast majority of modern processors.
It should also be noted that various different thermal pastes will require different applications. For example, Coollaboratory Liquid Ultra Thermal Paste is applied by applying an extremely thin layer on your processor (or the CPU die if you’re brave enough!). However, generally you’ll find most thermal paste to be of the same composition as the one we’ve used in this guide. Read next: How to install Windows 10.
How to apply thermal paste to a CPU: how to remove thermal paste
If you have a brand-new computer, this step will be irrelevant to you as you shouldn’t have any pre-applied thermal paste on the processor. However, if you previously had thermal paste applied on your processor, you’ll want to remove it before proceeding.
First you need to remove your old CPU cooler from the processor and clean the thermal paste using a cloth or a paper towel. Once you’ve removed the majority of the thermal paste, you’ll want to fully remove any residue that’s been left, by using TIM cleaner. In order to do this, apply a few drops of the TIM cleaner on a paper towel or cloth and then gently rub the solution in a circular motion on your processor. This will slowly clean the processor, resulting in a clean IHS. If there’s residue thermal paste by the CPU latch, feel free to open your CPU latch and clean the latch and sides of your processor. You can also do the same method to clean your CPU cooler’s heatsink. Once you’ve completed the cleaning process, you can move onto applying your new thermal paste! Read next: Best gaming PCs.
How to apply thermal paste to a CPU: Intel vertical line method
Intel CPUs generally have a rectangular die under the IHS, which means the vertical line method generally yields the lowest CPU temperatures. Through experience, we found that Intel CPUs run hotter on certain cores which are closer to the extremities of the die. For example, Core 3 on an Intel i7-3770K runs hotter due to it being closer to the iGPU module within the processor.
To properly apply the vertical line method on your processor, you’ll want to gently squeeze the thermal paste syringe in order for a small quantity to come out. Draw the syringe down in a vertical line. On our processor, this means applying the vertical line vertically on the written text on the CPU.
Now you can install your CPU cooler. We’ve used a piece of plastic so you can see the spread: you might notice the thermal paste application pictured has very small amount of bubbles present. This is the result of uneven pressure from the plastic part. You will not experience any air pockets with a proper CPU cooler. Read next: Best graphics cards.
How to apply thermal paste to a CPU: AMD pea-dot method
Note: Because we didn’t have an AMD chip and board to hand we took the lazy option and used same Intel chip. It’s the method that’s important! AMD CPUs generally have a square die under the IHS, so a more circular and round thermal paste application is preferred over the oval and rectangular shaped thermal paste application. Through our experience (and with correctly applied thermal paste), we found AMD processors to have an even spread of temperature through their CPU cores.
In order to achieve the best results on an AMD processor, you’ll want to apply the pea-dot method (also known as the middle-dot method). In order to achieve the best results, carefully push on the syringe of your thermal paste and put a small pea-sized dot at the centre of your processor. This will ensure the CPU heatsink will have an even thermal paste application on the CPU’s IHS.
After applying our clear plastic ‘cooler’, you can just about see a very small amount of bubbles present. As with the Intel method above, it’s simply down to the thin plastic: a real heatsink won’t cause this to happen.Read next: Windows 10 review.


