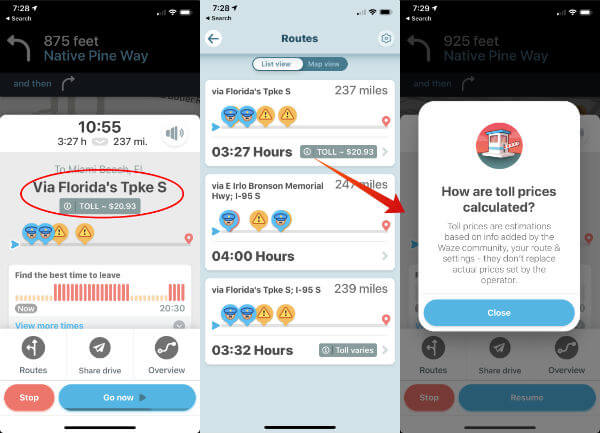
Let’s see how to add Toll Passes and get the Toll Rate on Waze for both iPhone and Android users. Editor’s Note: The screenshots are based on iOS. However, the same features are available for Android users with almost similar or a slight change in Waze Settings. The feature is only available in the US, Canada, and Puerto Rico right now.
How to Get Toll Rates on Waze
This feature is provided in the updated version. Make sure you have updated Waze app to the latest version of the app to see the feature on your phone. Now follow the steps;
Waze will display the toll price along with the ETA screen. We have tested this one on iOS13 and the screen above will be pretty much the same for Android users, too. You can tap on Routes for the alternate routes and the toll rates. Also read: How to Delete Google Map and Waze History
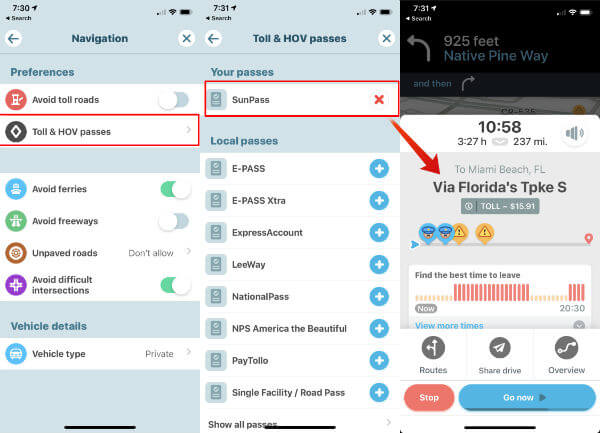
How to Add Toll-Pass to Waze App
The toll prices will be less for this who have a toll pass. To get accurate information about it, you can add your toll pass to Waze.
This time you may see a difference in the toll rate on Waze. The additional discount for toll-pass reflected on the updated price now. We have seen almost five bucks difference after we add the toll pass for the same route. You may face some issues to get the Toll Price on Waze, so, please have a look at the following checklist.
Accuracy: The rates may not be super accurate since the rates are reported by the Waze community. Vehicle Type: The toll price varies depending on the vehicle type. Go to Waze Settings > Vehicle Details > Vehicle Type > Select Vehicle Type. No Toll Roads: Make sure you allowed toll roads for the route suggestion. Go to Waze Settings > Navigation > Avoid toll roads > Turn Off.
Waze is calculating the toll rate based on your vehicle type, every day of the week and time of travel. The prices are obtained by the community and it may not be precise, but you can still get a good approximation about the toll rate.
Δ


