Using this tool, we can easily convert IMG to TAR files. It includes a dynamic link library (DLL) that serves as a Linux emulator and provides development similar to Linux. It also allows the development and testing of Windows-based apps on a Unix-like platform.
How to use Cygwin to convert IMG to TAR
In this guide, we’ll convert the IMG or zip files into tar using this tool. Hence, without wasting any more time, let’s move to the actual tutorial given below.
Downloads
Cygwin Tool
Steps to convert IMG into TAR using Cygwin
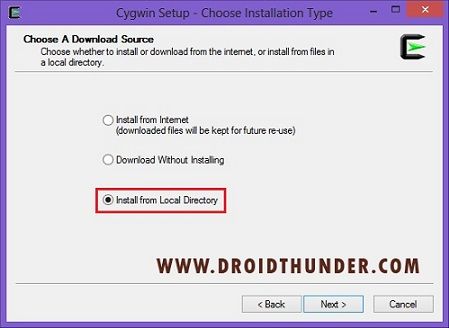
Download the Cygwin tool on your Windows PC. Note: Download the Setup file as per your 32-bit or 64-bit operating system. Right-click the setup file and run as administrator. This will launch the installation wizard. Click on the Next option. As soon as you click on next, the new window will ask you to choose a download source. You can install or download from the internet, or install from files in a local directory. Here we will select the install from the local directory option. And then click on the Next option.
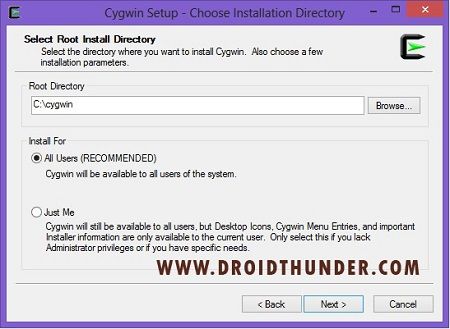
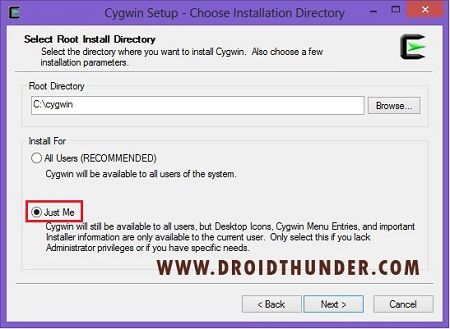
On the next screen, you need to select the root install directory. That means you need to select the path for installation. You can either select all users to make it available for everyone or select just me for the current user only.
Here we will select the Just me option. That means it will be available to all users, but desktop icons, menu entries, and installer information will be for current user only. Also, we will select Local Disk (C:) as the root directory. And then click on the Next option.
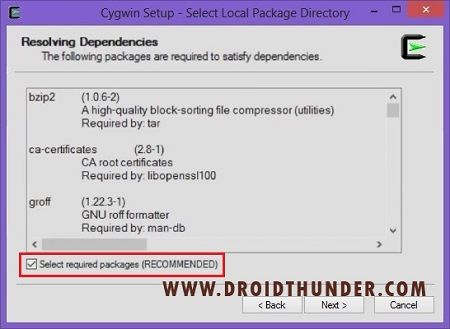
Now, you need the select a particular location where the setup will look for downloaded installation files. Here we will select the path as C:\users\admin\Downloads. You can select any path you want. And then click on the Next option. This will initiate the extraction of files in the local package directory. On the next screen tick, the select required packages option. And click on Next.
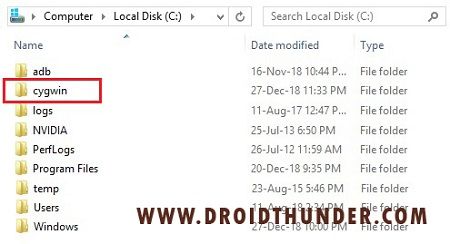
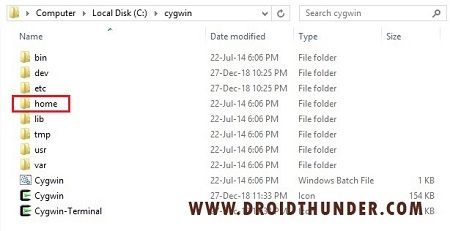
This starts the actual installation process. Wait and be patient until it completes. As soon as the installation completes, the wizard will ask to create icons for convenient access to the software. Click on Create icon on the Desktop option and tap the finish button. Finally! You’ve successfully installed the tool. Now let’s proceed to the conversion of IMG files into TAR.MD5 Odin flashable files. Open the Local Disk (C:) on your Windows PC. Then look for the Cygwin folder which you’ve just installed and open it.
Next, open the Home folder.
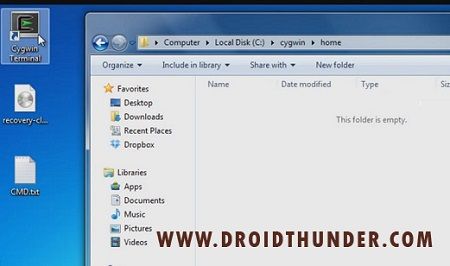
Initially, you’ll find the Home folder to be empty. Now, minimize the folder and launch Cygwin terminal present on the desktop, by giving administrative privileges.
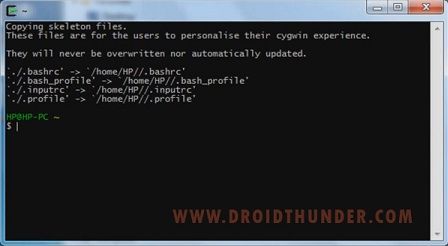
As soon as you launch it, the following terminal window will appear.
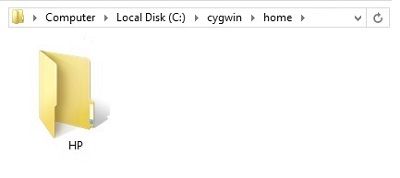
Also, a folder will be created in the empty Home folder. It will be named as per your computer name. My PC name is HP, hence the folder has HP name.
Open that HP folder and you’ll see these four files in it: .bash_profile, .bashrc, .inputrc, and .profile.
Now copy the IMG file (which you want to convert into tar.md5) here.
Whatever may be the name of that IMG file, just rename it to recovery.img file.
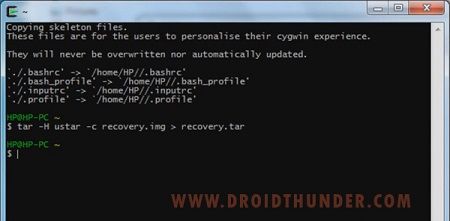
Then open the terminal window, type the following command, and press enter key:
tar -H ustar -c recovery.img > recovery.tar
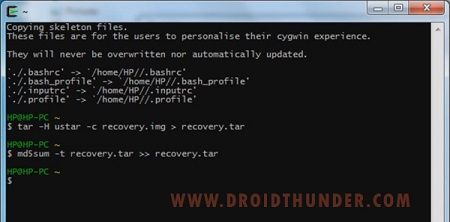
On the next line, type the following command and press enter key:
md5sum -t recovery.tar » recovery.tar
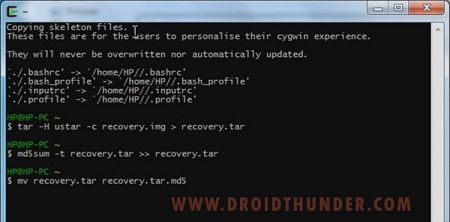
Finally, type the following command and press enter key:
mv recovery.tar recovery.tar.md5
This will create the recovery.tar.md5 file.
Conclusion
Finally! This is how you can convert IMG into TAR.MD5 recovery Odin flashable file. If you face any difficulty, or have issues related to this article, then do inform us through the comments box given below. Notify me of follow-up comments by email. Notify me of new posts by email.
Δ
